Monday 8 June 2020

Four Seasons Embroidered Button Clock created for Gina B Silkworks

Today I am sharing my project created with the new MDF Button Display Clock Set from Gina B Silkworks. My design was inspired by Gina’s lovely 4 Seasons Mirror Button Brooches Kit. I used the same freestyle ‘lace’ embroidery technique to create the embroidered trees into the central section of the clock, adding depth to a painted scenic background. 
I created 8 more thread wrapped and embroidered buttons to fit the Spring, Summer, Autumn and Winter theme for display around the perimeter. Instructions were from various button kits available from Gina along with my own thread stash and colours. Kits included the Victorian Button Journal Kit, Snowflake Button Pattern Pack and the Woven Button Motifs Design Booklet.

I created 8 more thread wrapped and embroidered buttons to fit the Spring, Summer, Autumn and Winter theme for display around the perimeter. Instructions were from various button kits available from Gina along with my own thread stash and colours. Kits included the Victorian Button Journal Kit, Snowflake Button Pattern Pack and the Woven Button Motifs Design Booklet.

Materials
Other optional accessories:
Circle Button Gauges (helps with even placement of thread wraps and embroidery on buttons)
Button Makers Third hand Tool & Tin (contains beeswax and a third hand for holding part wrapped buttons when changing colours and finishing etc.)

How it was done:
Preparation of the buttons for display:
I first created the 4 Seasons Mirror Buttons as given in Gina’s kit instructions. The kit contains enough materials to create 8 buttons; 2 of each of the 4 seasons. It also contains all the components, threads and needles required.
With one set of buttons I created 4 pendants (they are intended for making a necklace or brooch).
My second set of buttons were used for my clock display to place on each of the 4 main quadrants.
I next worked 8 more buttons for the display, 2 more for each seasonal clock quadrant. Instructions were followed from Gina’s Original Snowflake Pattern Designs, Victorian Button Journal Kit or from her Woven Button Motif Design Booklet. You could include any buttons that you like by creating in colours and designs to suit the seasons.
Four buttons were made on fabric covered slightly domed wooden moulds from my stash. You can use the 25mm flat button moulds included in the clock kit instead. Just cut some felt circles to place on the button front before covering to give a bit of padding and shape.

To cover my buttons I cut fabric circles approx. 45mm in diameter (i.e. enough to cover front and wrap around back of button). I then worked a row of running stitch to gather up and pull in the fabric over the button back.

I then worked designs from Gina’s Original Snowflake Buttons Designs or from her Victorian Button Journal Kit.

Top Left – Spring Button: Victorian Bordered Star pattern in pink perle cotton. I embellished with extra stitching and French knots in yellow perle cotton.
Top Right – Winter Button: Snowflake pattern C in white perle cotton, working on a fabric base rather than a thread wrapped button base. I also added a little extra stitching around the perimeter.
Bottom Left – Summer Button: Victorian Flower pattern in purple and yellow perle cotton. I added some extra French knots to the centre.
Bottom Right – Autumn Button: Victorian Lace Circle pattern in red and yellow perle cotton.
The next 4 buttons were worked on 25mm flat button moulds as included with the clock kit. I worked designs from Gina’s Original Snowflake Buttons Designs or from her Woven Button Motif Design Booklet.

Top Left – Spring Button: Woven Button Flower Sprig design in off white, green and orange perle cotton.
Top Right – Autumn Button: Woven Button Leaf Style 3 design in brown & orange perle cotton for the base wrap and green for leaves.
Bottom Left – Summer Button: Woven Button Lavender Flower design in pale yellow perle cotton for base and green & orange for woven flower.
Bottom Right – Winter Button: I worked a 6 point wrap with perle No.8 pale green thread and worked the Snowflake Pattern B with white perle No.8 thread.


Decorating the clock:

I first covered my clock base with white Gesso. This step is not essential but it provides a good base for painting. A clean bright base will show acrylic colours to their best. Particularly if using semi transparent acrylic colours (different paints vary in opacity) where the MDF base colour would affect the overall colour of subsequent painted layers). It also saves acrylic paint as it stops paint absorbing into the porous MDF.
The clock was then painted with acrylics to create a background scene on which to work the embroidery.
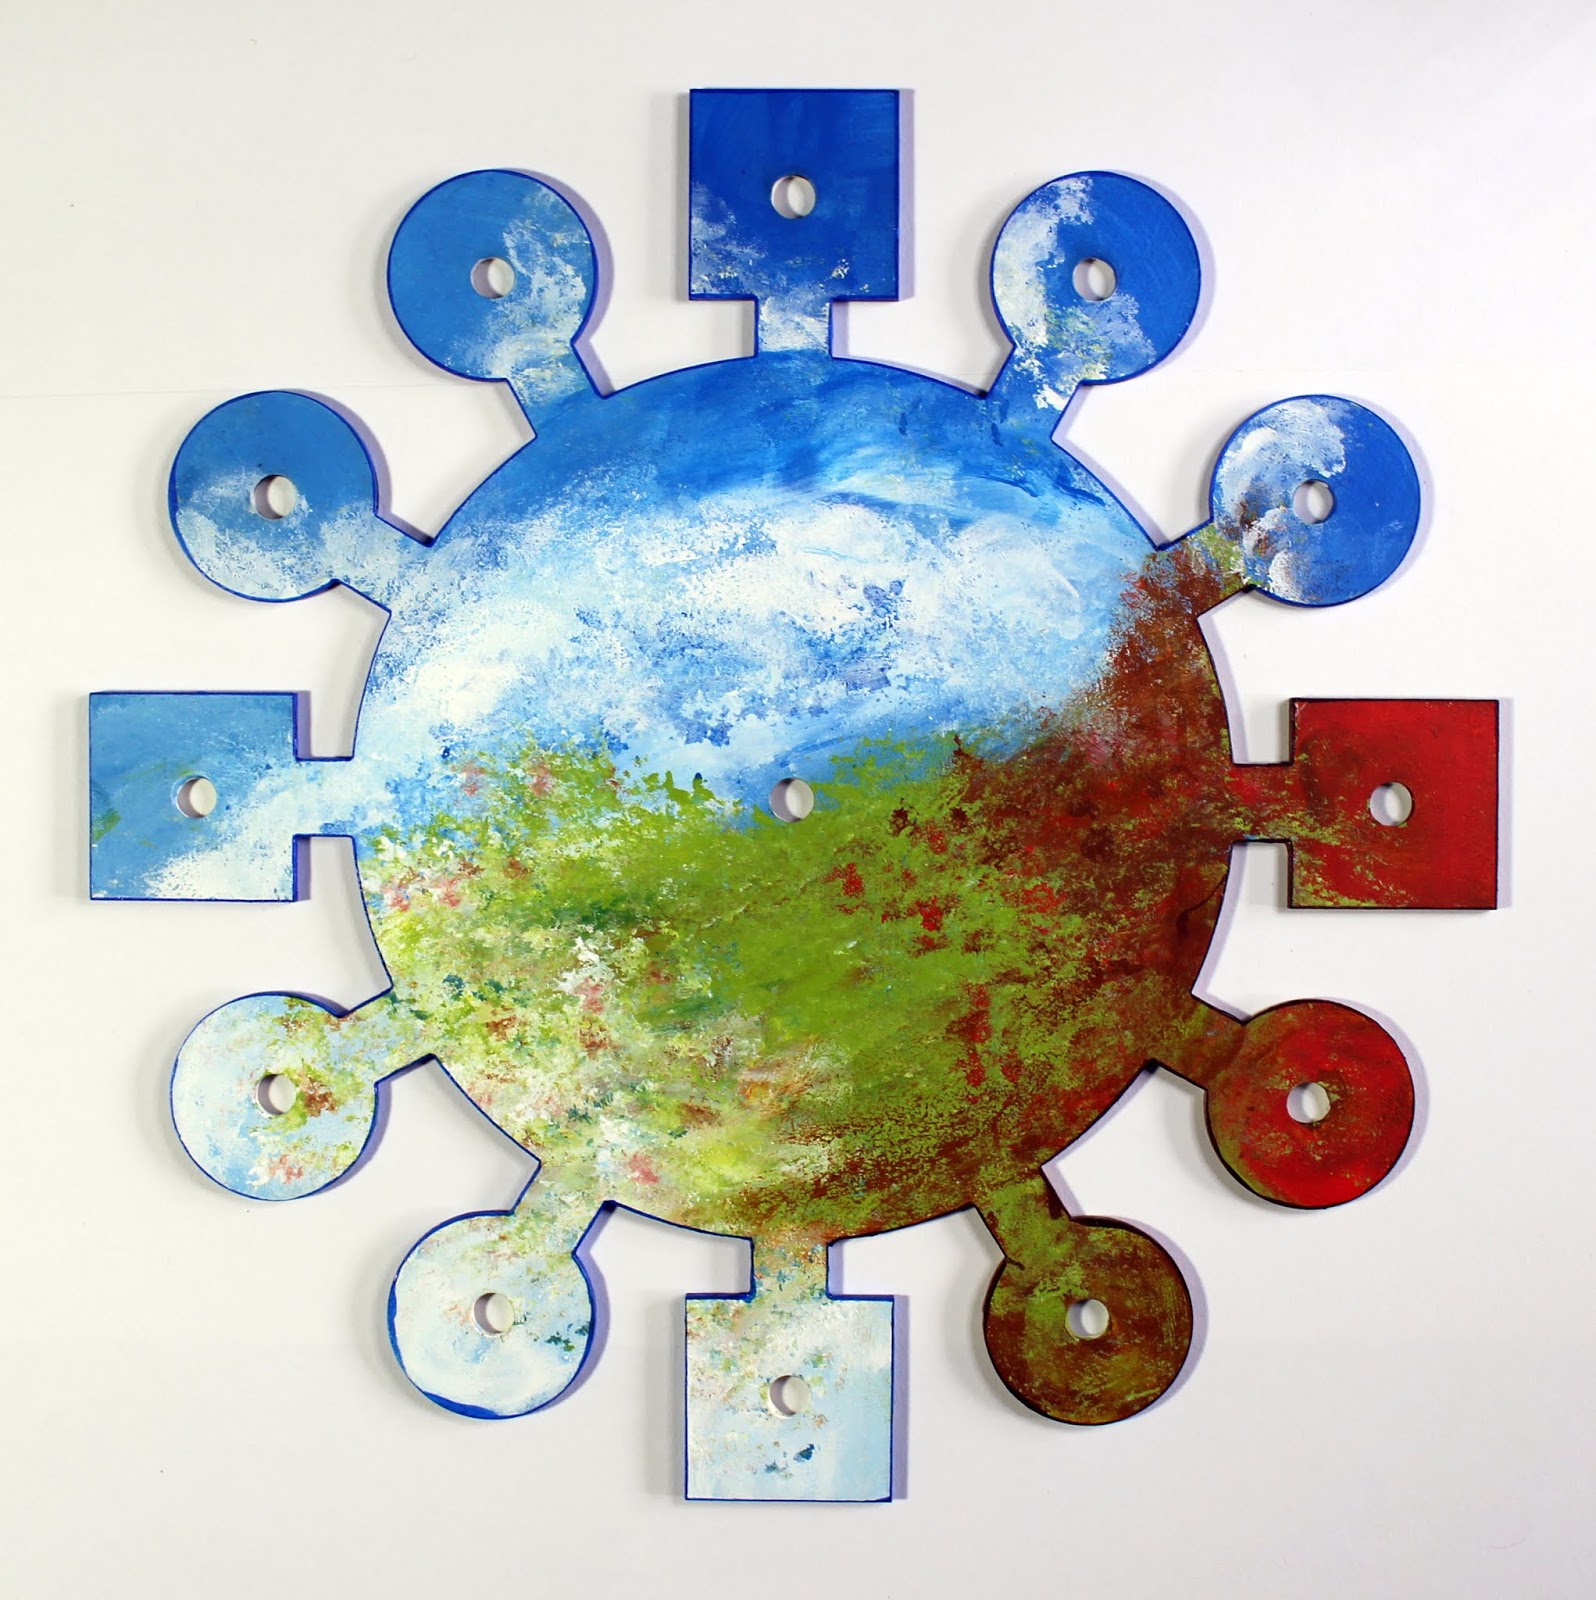
In keeping with the 4 seasons theme I painted a background sky with clouds on the top half of the clock (which will be my Spring and Summer clock quadrants). In the lower right foreground I introduced greens, browns and red to represent the Autumn colours. In the lower left I used pale and white colours for my Winter quadrant.
I introduced texture by ‘stamping’ paint onto the surface using the sea sponge. This was worked really quickly and randomly, just to give the impression of foliage. It is important to rinse paint out of the sponge quickly when done (acrylics dry very quickly and will ruin the sponge if left to dry).
Once the paints were dry I used alcohol markers around the clock edges to neaten and to frame.
I laid out the buttons into their positions to check how they looked (not stuck down yet).
Dark green perle 8 cotton was used to wrap around the thread spokes. This was to create an outer frame on which to anchor the tree embroidery.
I wrapped around the edge of the clock 3 times to create a neat frame. I used a little Transparent Powertex on the back of the clock (behind the spokes) to anchor and glue the threads down securely and prevent them working loose (leaving the front threads free).
Next the main tree trunks, branches and roots were created using similar techniques as used in Gina’s 4 Seasons Mirror Buttons – only on a much larger scale. I didn’t take a lot of step by step pictures here (sorry) but will try and talk through how I went about it with tips to help you create similar.
While working this embroidery it is really important not to add too much thickness or depth which would impede movement or catch on the clock hands. I tried on the hands to work out the clearance needed, paying particular attention to the short hand which fits closest to the clock base (subsequent hands fit slightly further outward). The clock hands are fairly soft metal so can be very gently eased upward slightly if needed (if you do this you would need to adjust the angle of all the hands so that they don’t catch on each other). The tightest depth area is in the very centre of the clock so I kept this area free of embroidery.

Should you have a bit of a disaster don’t fret. After all that hard work, all is not lost. Clock fittings are easily available from various online sources with different spindle depths, so a fitting with a longer spindle could be substituted if needed.

To work the trunks, branches and roots I used a mix of perle 5 and 8 threads in browns, greys, and creams. Stranded cotton threads could also be used, splitting them down and working with 3 or 4 individual strands together.

To start I tied thread onto the outer frame and worked back and forth laying threads loosely across the clock, tying top and bottom to make the main trunk foundation. Next I started weaving and wrapping threads, working up and down the trunk and taking branches and roots off to the edge. As the extra branches were worked the embroidery was pulled more tightly to hold it flatter. This tightened up the main trunks. Weaving and wrapping also tightened things up.

I first worked the right hand tree using warmer, deeper and richer browns and creams. This half represents the Summer and Autumn quadrants. I then worked the left hand tree in cooler colours to represent Spring and Winter sections. Where the branches intersected I was careful not to increase the embroidery depth, working branches that intersect in sections (rather than creating a double thickness where branches crossed).
Here is a closer view showing the colour contrasts and stitching detail. I tried to create the effect of light coming through the centre by using lighter colours on the inner tree trunks. I also added extra texture using occasional French knots.
I again laid out the buttons to see how they looked (not stuck down yet). Woohooo – I so enjoyed making this. Next for the foliage.
Before gluing down the buttons I worked the foliage and blossoms. I used stranded cottons (working with 3 individual strands) in a variety of greens and lemon for the foliage, worked in random French knots. Again I used deeper, warmer colours on the right hand tree. Variegated threads are nice to use as you automatically get a mix of colours while working.
I then added pink blossoms to the left hand tree.
Finally I worked more French knots along the root sections; warm Autumnal colours on the right and Winter colours on the left. Little grassy tufts were worked by tying on wisps of thread.
Next I stamped the sentiment using Stazon Ink. I thought that the ‘time flies’ sentiment suited the time going through 4 seasons theme.

Before gluing down the buttons I treated them, and the embroidery, with Transparent Powertex in order to seal everything. Powertex is primarily a fabric stiffening medium. It also acts as a glue so helps to hold down all the embroidery onto the clock face so it keeps it all flat and less likely to lift and catch on the clock hands. A damp cloth can also be used for cleaning as Powertex provides a waterproof seal. It also does not discolour with time (whereas some glues certainly would).

To get a nice finish with Transparent Powertex you need to take care not to over flood it. Too much could leave a ‘gloopy’ looking finish. I use a paint brush to work the medium well into the fibres, working small sections at a time. I then quickly remove any excess from the surface quickly (before it starts drying and going tacky) by dabbing with a clean cotton rag (e.g. old tea towel). I find that this method works really well and makes the finish hardly noticeable.

Finally I glued down all my buttons using clear drying thick acrylic gel medium (other 3D glue gels would work too). If you would rather be able to change your buttons around then use Gina’s recommended method and make a button shank to hold your buttons on with pins.

Delighted with my finished clock and I had so much fun creating it. It was definitely a labour of love, not a quick make, but well worth it.

Hoping that you are all keeping well during this difficult time. Let’s hope that time does fly for us all and that we are back to some sort of ‘normal’ living very soon. Take care.

Happy Crafting, Anne x.


Thursday 31 October 2019

Spooky Halloween Tassel


Good afternoon. I just had to share a Halloween make today. I hope that you like this creepy tassel that I made as a sample for Gina’s recent tassel making shows on Hochanda TV.

Materials:
  • Polystyrene egg
  • Orange mesh ribbon (approx. 1 inch wide)
  • Commercial embellished cord – orange felt flowers, pearls, beads, sequins, pumpkin shaped metal bells attached to orange raffia cord (from my stash)
  • Double knit wool (gold/ochre)
  • Black ribbon and commercial black cord scraps
  • Black die cut sentiment ‘Boo’ (Tattered Lace Die)
  • Bats and spiders cut on my Silhouette Cameo machine from black card (Silhouette Store: ‘Spider Web Lantern’ from Jennifer Rush and ‘Bats Flying’)
  • Gold and black flower shaped sequins
  • Strong cotton thread for tying (I used warping cotton but a button thread would work too)
  • Clear drying fabric glue or PVA
  • Sewing needle & thread, extra-long sewing needle (e.g. Shashiko or doll needle)
Recommended Tools and Tassel Tutorials:
Gina B Silkworks has a fab selection of tools and publications which will help you to make a range of tassel embellishments: from soft tassels suitable for clothing, to more complex tassels for soft furnishings. Here are a few items that I can recommend for tassel making.
How it was done:
  1. I first covered the egg by wrapping with the mesh ribbon. It was easiest to wrap in a top to bottom direction (i.e. turning the egg on a vertical axis as wrapping around). Secured with a couple of stitches and fabric glue.
  2. I next made the long wool tassel skirt and tied with strong thread. I used the extra long needle to secure it onto the egg. I passed the needle up through the egg to anchor, and out of the top to make a hanging loop. The join was covered with black cord to neaten.
  3. The neck of the tassel was then bound with strong cotton. I secured lengths of the embellished raffia cord into the binding. This was then covered with a black ribbon wrap and tied bow.
  4. Next I glued on the spooky embellishments and sequins. I attached the bats and spiders onto the cords by gluing 2 cut shapes together sandwiching the cord between the card shapes.
Happy Halloween x.


Monday 28 October 2019

Teneriffe Lace Shawl created with Vandyke Border Loom from Gina B Silkworks


Tonight I am sharing a shawl embellished with Teneriffe Lace and block printing that I made ready for Gina’s Lace show on Hochanda TV tomorrow at mid day (29th Oct 2019 on Freeview Channel 85 or watch catch up online via their website).


Gina has a button show at 4pm too where she will be bringing lots of her fabby historical button making kits, books and DVDs. Both shows are a must to see if you love textile embellishments, trims and passementerie.

Materials:
  • Lime green crochet cotton no.3 (Delfino – Filo Di Scozia)
  • Lilac DMC Mouline Cotton (like a standard 6 strand embroidery floss but on a large spool)
  • Sewing thread and needle (lime green)
  • Lime green cotton triangular shawl (made from quilting cotton) with sides measuring approx. 1m (I overlocked the edges using matching thread to prevent fraying)
  • Teneriffe Lace Starter Kit Loom 3 (Gina B Silkworks)
  • Teneriffe Lace Vandyke Border Loom set (Gina B Silkworks)
  • Fabric glue (optional)
  • Thick dense foam mat (such as provided with Gina’s Total Trimmings Table) or upholstery foam (optional if wanting to use pins for stretching the web)
  • Laundry starch spray (optional)
  • Decorative Indian wooden printing block and foam printing mat (Colouricious). The one I chose from my stash was approx. 9.5cm square with space in the centre to add the lace floral motifs
  • Setacolor Opaque (Spring Green, Raspberry and Parma Violet) and Deka Perm (Opaque White) fabric paints
  • Kitchen sponge and paint tray
  • Iron
How to do it:
Gina’s loom kits provide general instructions for stretching the web, darning, reverse backstitch and knotting etc.

Note: The hardest part to get right is the Teneriffe Lace Knot which holds it all together. Get this wrong and your lace won’t hold together properly when you remove it from the loom. Should this happen, don’t despair, do what I did with my first lace attempts and glue it to a card or a mixed media canvas. Ha ha.

There is a great beginners video from Gina to help with this.


I spent quite some time developing the lace pattern by quite a lot of experimenting, undoing and redoing until I was happy with the result. Don’t be afraid to play. Gina has also provided some easy starter lace borders in the instructions so you could try these first and make up a couple of smaller projects first.


The Border Lace:

Whenever thread ends were tied and finished, or working threads joined with knots, I added a small dab of clear drying fabric glue for extra security. This is optional but I thought it would ensure no loosening of thread ends, particularly during lots of wear and washing etc.

Starting: I stretched the web on the Vandyke Border Loom leaving a long end at the start and keeping the ball in place on the left hand side (to avoid making joins as the border is continued). Here I have wrapped the thread end a couple of times around the loom end to hold the tension in place.
I made an angle on the first end so that it would continue on the shape of the shawl corner. The pins were placed on a diagonal and threads held together by K 2e (knotting 2 threads to hold).
Note: When working some of the bigger projects I prefer to use pins to hold the web rather than lacing with waste thread. It is a little less portable in this method but much quicker to stretch the web.

Row 1: I worked a row of sc (scalloped edge by k 2e to create small anchored loops) along the bottom edge, joining in a new thread as required.

Row 2: Next I worked a row of K 2e (keeping the pairs of threads in alignment with the first bottom row of knots) along the centre of the lace band.
Note: For each row I joined a new length of yarn. Once worked this was loosely wrapped and tied (to prevent tangling) and kept on the left hand side, ready to work the next section of the lace as the lace is moved on along the loom.
Row 3: I then worked a row of sc along the top edge. See how the threads now separate to give a lacy effect. Again I joined a new thread for this row.

Row 4: A row of k 4e (4 threads knotted together such that the groups of knotted threads aligned with the peaks and troughs of the top edge) was worked in the centre of the bottom straight border section. This opened out the threads into a pretty lace design.
Row 5: A row of *k 2e (x3), k 4e (x1), K 2e (x3)* was repeated along the top border. The 2e knots were worked just below the knots on the sc edge and the 4e knots were worked about half way down the space. This created a nice section with 7 little spaces, ideal for darning (weaving) in the next row.

Row 6: Next I joined in the lilac thread. To start I knotted just under the threads of the previous row until reaching the centre of the 7 space section.

Row 6 continued: The 7 space section was progressively darned (pdt) for 8 rounds. The thread was taken under 1, over 2, under 2, over 1, under 1, then over 2 and under 1 to complete the first round (starting at the top left hand side single thread). As the rounds are worked the weave goes in the opposing over/under direction naturally (as there is an odd number of thread groups/spaces).
When 8 rounds were complete the thread was taken under the first thread bar again before moving along to the left with knotting.

Full row 6 repeat:  *k 2e (x3), k 4e (x1), pdt (x8) in the round, u 1e, K 2e (x3)* repeated along the top border.
These 6 rows form the pattern repeat for the straight border sections. The straight knotting rows are quite quick to work but the darning does take a little longer. Well worth it though I think.

The lace was then removed from the loom ready to work the next section.


The first few loops were replaced onto the end of the loom and the next section of web was stretched ready to work. Here you can see the ball kept in place (keeping the web continuous without thread joins). The working threads were loosely tied for each row (keeping them separate, tying in a new length as required).

The next section of lace was then worked as given above.

Again the lace was moved along as each section was completed. I was so excited to see it grow.

I had calculated that I would need 25 little peaks to fit along the sides of my scarf before needing to turn the corner (the space between each peak being approx. 4cm and the sides of my scarf being approx. 1m).

Note: The lace does pull in slightly when removed from the loom (the amount will vary depending on stitches used). Bear this in mind and check that the length of your lace is OK before turning the corner (particularly on a large project).

As with the straight border I pinned the first few loops of lace onto the corner loom and laid out the pins ready to stretch the web.

I stretched the web on the first half of the corner then spent some time thinking – how was I to make a corner pattern that would continue the straight sections nicely? This took me some time – ha ha.

The threads on the corner diagonal of the web need to be interlocked. I therefore broke the thread and stretched the next section of the web, threading up the needle and passing through the loops of web on the diagonal (Gina explains this in her instructions). I then tied the thread end back to the ball end of thread.

I had a lot more thinking here about where to go next – tee hee.

I worked rows 1-4 as previously adding extra knots where the diagonal threads crossed to make sure that the intersection was well anchored.

I then started row 5 and had a lot more thinking on the corner section. The full peak sections on either side were to be completed in the same pattern but I wasn’t sure what to put in the corner. I liked how I had continued the bottom border section keeping the design cohesive.

Continuing row 5: After the first 3 knots (worked as per the normal pattern) I then moved to the centre and knotted up one side of the diagonal and back down the other (k 2e). This anchored all the threads well on the upper part of the diagonal. Note that I split the thread groups (see above where the outer threads are grouped together on the web) to make a lacy effect. I hope that this makes sense. It is difficult to explain – sorry.

Continuing row 6: I worked the first peak in the same way as usual then worked 3 knots up the outer edge (as in a normal row start). See picture below.

The corner was completed by weaving 2 little ‘leaf’ sections across the diagonal threads. Starting at the tip I wove down to the middle (filling the space), then up the other side and then 3 knots were worked down to the trough section as normal. The next section being worked as per the normal pattern.

The lace was then removed from the corner loom and replaced back onto the border loom ready to work up the other side (as shown above).

Here you can see the full length of one border and the corner turned ready to work the other side. I got very excited here – ha ha.

Here is a close up where you can see the corner more clearly.
Although fairly pleased I still wasn’t completely happy with it (more thinking! Ha ha).

I took the lace back off the border loom and quickly anchored it back onto the corner. With a new length of thread I added a little circle of weaving (over 5 groups of thread). I was happier with the result now.

I continued with the usual pattern until the last section. Here I again wanted a diagonal finish on the end.

Here I have shown the corner of the scarf so you can see what I mean. The loom is not designed to make diagonal ends as I am wanting so you can see one of the pins is slightly out of alignment here. This loop is adjusted when knotting (see below).

You can see here that the misaligned pin is removed as the last knot is worked on row 2 (the ball thread end then being tightened up). The other pins sit on the diagonal path OK.

Happy with my finished corner – finally – ha ha.

Block Printing:

Next I wanted to create a pretty block printed border.
I used the lime green paint on the outer part of the block (applying with kitchen sponge).
I mixed a little of the Raspberry and Violet with quite a lot of White to create a colour that matched well with my lilac thread. This mix was sponged onto the inner section of the block for printing.
The scarf was laid onto the foam base for printing. This provides a little cushioning against the solid wood block ensuring that the detail prints well.

Oooh yummy print.

Oooh – I was a happy bunny. I left the paint to fully dry overnight then heat fixed by ironing on the reverse on a cotton setting.
I then hand stitched on the lace border easing it to fit. In order to provide a little stretch and ease I used a slight zig zag when stitching (this allows a little stretch without popping of the thread). Next I sprayed with starch and ironed. This smoothed any slight lumps & waves that formed after attaching the lace and also stabilised the lace nicely.
I was so chuffed with how the lace border and printing looked.

The Floral Daisy Motifs:
Next I worked 16 small daisy motifs on loom 3.

I stretched the web on the smallest circle and lime thread to create 16 edge loops (i.e. total of 32 threads crossing the central section).

I then worked DD (double darning 2e) for 2 rows in the centre to neaten up the crossing threads etc. On the second row I offset the threads darned in the first row (as in weaving).

I then worked Revs (2) for 3 rows: Reverse backstitch over 2 threads. Ensuring that the threads from adjacent ‘loops’ were grouped together to form the outer ‘petal’ loops. Note: The side facing you is the back of the work.

Then I worked K 2e for 1 row: Knotting 2 threads together to secure groups of threads creating the long scalloped edge loops that make the petals.

These little flowers would make great earrings or could be joined to make a lovely necklace. In fact it was these that gave me the idea for my black lace earrings blogged in my previous post earlier today.

Finally I finished the shawl by sewing the little daisies into the centre of the block printed motifs.

I hope that you like my lace shawl. Teneriffe Lace is definitely a ‘slow craft’ akin to knitting or cross stitch, don’t expect quick results. This project took me around 25 hours to make! Take your time and enjoy the process xxxx.