

Materials:
- Kingfisher Song, Sticks & Stones, Baroque Meadow, Silhouette Grasses, Words to Dazzle and Sparkle stamp sets
- 15 X 18cm card blank (Kraft card), 18 X 20cm card blank (white), card for background mat & layers (white), white stamping card (Sheena Douglass), waste copy paper (for masks), scrap card (brown and green for foliage die cuts)
- Inkpads: Versafine (Black Onyx), Memento (Tuxedo Black), Distress Ink (Victorian Velvet)
- Ink sprays: Lindy’s Stamp Gang (Cocklebells Coral, Opal Sea Oats, Azure Sea Asters)
- Spectrum Aqua watercolour pens (pinks, greens, browns)
- Spectrum Noir Sparkle pens (clear, gold, pink, green, and turquoise)
- Cosmic Shimmer PVA pearls (Olympic Gold)
- Fine tipped pen (brown) and Spectrum Noir alcohol pen (brown)
- Soft Form Relief Paste (Gold and Silver)
- Starlight Metallic Paints (turquoise, pink, gold)
- Rectangle dies approx. 9.5 X 12cm and 6.5 X 3.5 cm (Heartfelt Creations Cut Mat Create set), dies to cut rectangular frame (Tattered Lace Rectangle Accordion), dies to cut twigs (Sheena Douglass) and ferns (Tattered Lace Floral Layers Leaves 1)

The twigs and ferns were cut from coloured card and further
coloured with watercolour pens (to give them more dimensional colour).
The cut out card kingfisher was stamped with Versafine and
coloured with watercolour and sparkle pens. The kingfisher scene stamp was used
for this, the rest of the scene being cut away and discarded.
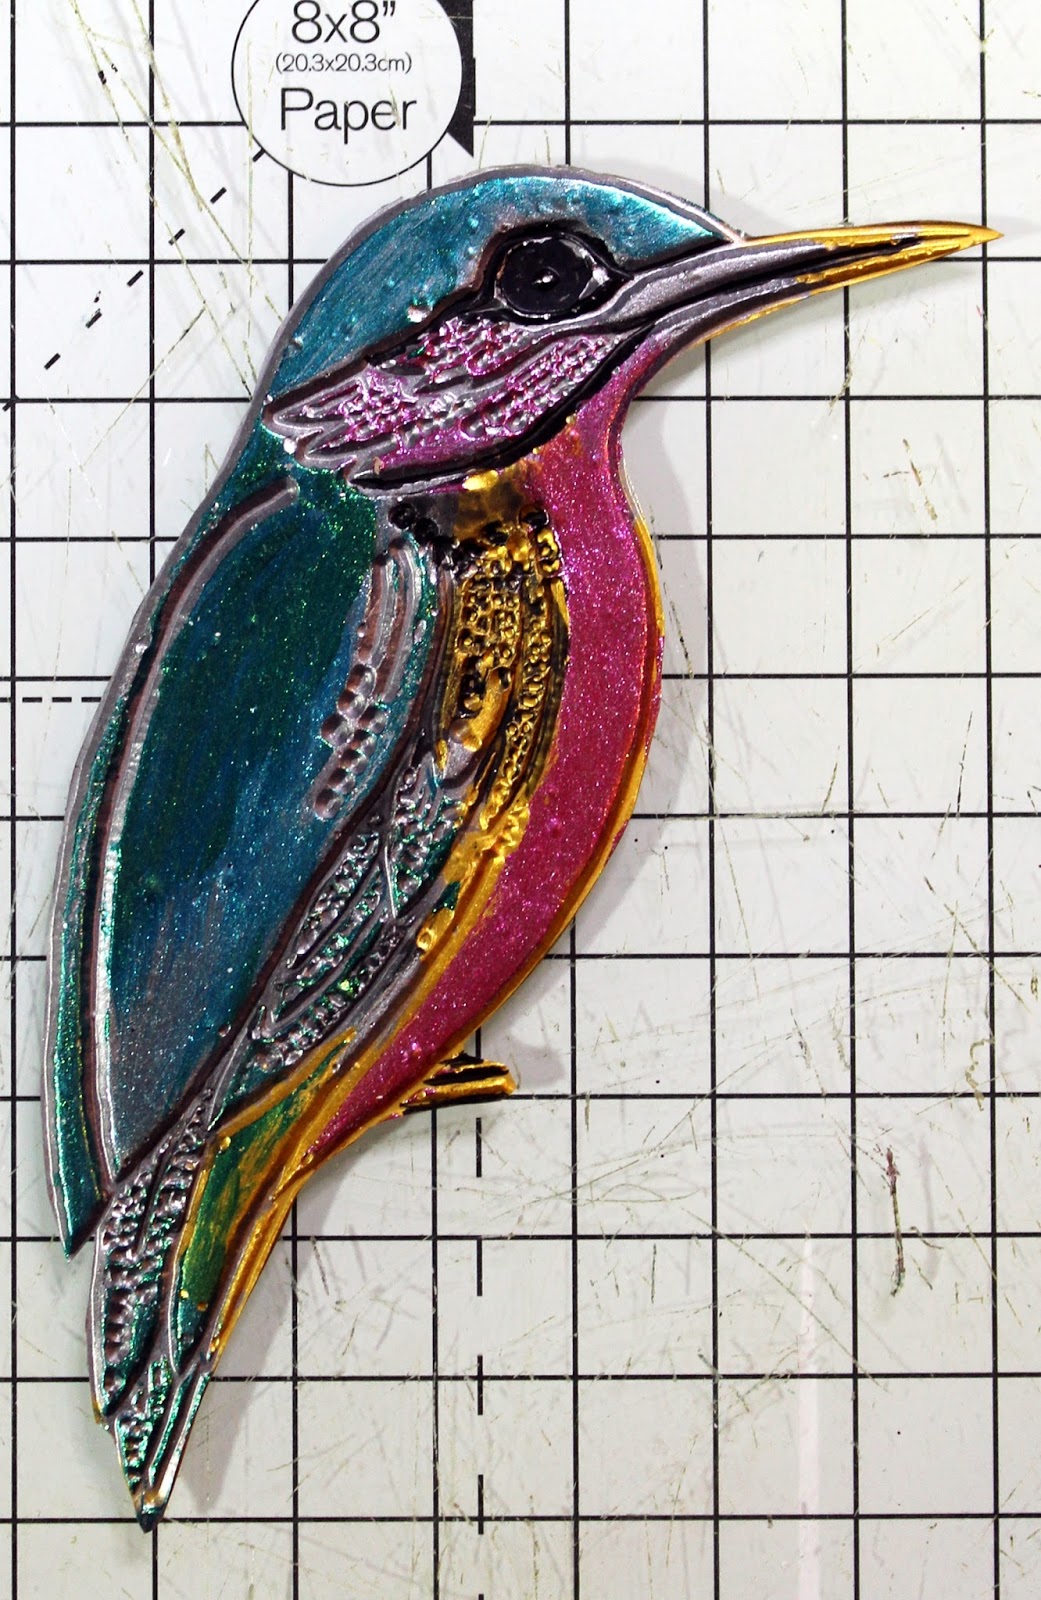
The larger dimensional kingfisher was created by spreading
gold and silver Soft Form Relief Paste over the stamp. This was left to dry
overnight before peeling off the stamp. Rough edges were trimmed away and
further colour added using the Starlight Paints (leaving some areas of gold and
silver paste showing through).
Creating the Kraft card
blank:

The frame and central background mat were cut from white
card using the Accordion die (largest die). This creates an attached mat which
was snipped away from the outer frame. Faux stitching was added with a fine pen
using the pin holes as a guide. These were then glued to the Kraft card blank
(finished size approx. 15 X 18cm). If you don’t have this die you could easily use
other rectangle dies to produce similar.
Creating the
background scene and scenic frame:


An A4 sheet of stamping card was spritzed with inks,
spraying blues nearer the top and golds at the base. The sheet was trimmed to
slightly under 18 X 20cm and a sentiment mat cut from the excess (6.5 X 3.5cm).
Grasses and butterflies were stamped along the bottom edge
using a mix of watercolour pens. Tip: Brush the colours directly onto the stamp
then ‘huff’ onto the stamp before stamping. Moisture in your breath reactivates
any partially dried watercolour.
The aperture was cut with the rectangle die (approx. 9.5 X
12cm). Edges were inked with Distress Ink.
Finishing the simple kingfisher
card:
Additional ferns were stamped in dark green along the base. Finished
by gluing the scenic mat, kingfisher, branch and fern embellishments to the
card front with 3D glue for added dimension.
Creating the scene
for the frame aperture:

Stamping card (larger than the aperture 9.5 X 12cm) was
spritzed with inks in the same way as the other scene backgrounds.
The scene was built up working from the foreground base
upward, stamping with Memento (waterproof when dry).

Scene components were stamped onto copy paper and cut out to
create masks. These were simply laid in place, covering the appropriate stamped
images, before stamping the next scene
layer. Tip: To stop masks moving while stamping you could use a couple of dots
of zig 2 way glue on the back of the masks. Leave it to completely dry clear
before placing the masks (the glue goes on blue and dries clear). This then
acts as a temporary adhesive to hold the masks in place.

I continued building up the scene using masks where needed.

The scene was trimmed down to fit behind the aperture and coloured
with watercolour pens. Silhouette grasses were stamped in the foreground with
Versafine. The sentiment was stamped onto the sentiment plate.

No comments:
Post a Comment