Saturday 30 September 2017

Fantasy Woodland Birthday Card created for Chocolate Baroque

Good afternoon. This was another of my recent show samples created for Chocolate Baroque using the Fantasy Woodland stamp set.


Materials:
  • Fantasy Woodland and Birthday Words stamp sets
  • A5 ready made card blank with scalloped edge, patterned paper with script
  • Inkpads: Versamark and variegated pigment ink (purple & blues)
  • WOW embossing Powders (Clear Gloss, detail white)
  • Water based opaque Gouache paint (white)
  • Pen (opaque white), glitter pens (pink, green)
  • Glitter glue (clear)
  • Faux gem flowers (pink, green)
  • Corner rounder punch
How it was done:
  1. The paper was trimmed and the corners rounded off with a punch.
  2. The trees were stamped with Versamark and embossed with white powder, the sentiment with pigment ink and clear powder.
  3. The scene was extended at the based, and faux stitching added, using the white pen.
  4. A little thinned white gouache was added behind the sentiment to emphasise it slightly. I wanted it to be subtle but visible.
  5. The flowers were coloured with glitter pens and faux gems stuck onto the centre tree.
  6. Finally I added a little clear glitter glue for more sparkle.

Happy Birthday card created for Chocolate Baroque

Good afternoon. This was another of my recent show samples created for Chocolate Baroque using the Fantasy Woodland and Tall Trees stamp sets.

Materials:
  • DL card blank and white stamping card
  • Fantasy Woodland, Tall Trees and Birthday Words stamp sets
  • Inkpads: Versamark, Marvy Matchables (Purple dye based)
  • Embossing Powder (Crafters Companion Holo Twinkle)
  • Water based inks (Spectrum Noir Aquatints, Lyndy’s Stamp Gang Spritzers) and Brusho Powders
  • Alcohol marker (purple)
  • Fine tipped marker (opaque white)
How it was done:
  1. The main tree and sentiment were stamped with Versamark and heat embossed with the white sparkle powder.
  2. The background was coloured with water based inks and some Brusho crystal dropped into the wet inks.
  3. The background trees and foliage were stamped with dye based ink.
  4. Touches of white pen were added to extend the scene and highlight. The topper was edged with the purple marker to frame and glued to the card front.

Thursday 28 September 2017

Autumn Birthday Card created for Chocolate Baroque

Good afternoon. Catching up on a bit of blogging today. This was another of my recent show samples using the Autumn Edges stamp set from Chocolate Baroque.


Materials:
How it was done:
The edge was stamped directly onto the card front with Versamark and heat embossed with gold sparkle powder. Coloured with sparkle pens. The yellow Gelato was dissolved in water and painted around the border.
The topper was stamped with Versafine and blended with Distress Inks. Glued to the card with 3D gel for added depth. Finished with a little glitter glue.

Each Day is a Gift card created for Chocolate Baroque

Good afternoon. This was one of my recent show samples using the Autumn Edges stamp set from Chocolate Baroque.

Materials:
How it was made:
  1. The archway was cut from black card and brushed over with gilding wax to give a metallic effect.
  2. The tree was stamped onto watercolour card with Versafine and heat embossed with clear powder. The card was then spritzed and sprinkled with Brusho powders to create a background. The topper was glued behind the archway and trimmed to fit.
  3. The tree scene and sentiment was stamped onto stamping card with Versafine. The scene was extended to the edges using the fine tipped pen. The background was coloured lightly with Distress Inks and edged with the brown marker. The sun was created using the stencil.
  4. The arch was glued to the card topper with 3D gel for added depth.
  5. Finished with a little Glossy Accents on the arch, and PVA pearls.

Tuesday 26 September 2017

Fantasy Sea Shore Canvas created with Powertex

I simply love Powertex for creating mixed media. It enables you to sculpt fabric and to create 3D embellishments – the possibilities are endless.


I simply adore the sea but unfortunately I couldn’t live further away from the seaside. I had so much fun creating this one and disappeared into a fantasy world of sea, sand, fossils and shells. So much scope for texture.


I recycled an old cotton scarf and a bit of old potato sack, created extra texture using sand and balls, and even created the fossils using moulds with Powertex clay.


I hope that you like my fantasy sea shore.


Materials:

Harlequin Bouquet Canvas created for Chocolate Baroque


Good morning. Today I am sharing a small canvas created with the lovely floral collage stamp (Harlequin Bouquet) from Chocolate Baroque.

Materials:
How to make it:
  1. Stamp the image onto stamping card with Versafine and heat emboss with clear powder. Colour with water based pens.
  2. Randomly Spritz the canvas background and cover with UTEE while wet. Heat to melt. I wanted a bit of a random texture rather than smooth glass effect. If you want more texture pour a bit more powder onto the hot UTEE and melt. Ink the sentiment with StazOn and press into the molten UTEE. Leave until it sets before peeling away. I found the image was a little feint so darkened using an alcohol pen – drawing into the impressed lettering.
  3. Apply the glitter paste with a palette knife onto the background using the leaf stencil. Apply modelling paste through the butterfly stencil. Leave to dry.
  4. Lightly spritz the watercolour card with inks (you want it to be lighter than the canvas background so that it stands out). Cut out the frame with the decorative die and apply some ink to the edges with a sponge to define. Trim the main image to fit behind the frame and glue together. Mount onto the canvas with 3D foam.
  5. Finish with touches of glitter glue.

Sunday 24 September 2017

Free Machine Embroidery Experiments using colouring pages from Chocolate Baroque


If you love colouring there is a wonderful colouring page kit available from Chocolate Baroque. These are great for making finished pieces for framing or simply to have fun colouring. The kits also contain a colour wheel and tips for colour mixing too. The kit is limited edition (so when they sell out they are gone) and was created using gorgeous hand drawn images from Sue Page. There are 7 fabulous designs (2 copies of each) plus a couple of practice pages to test out colouring methods etc.


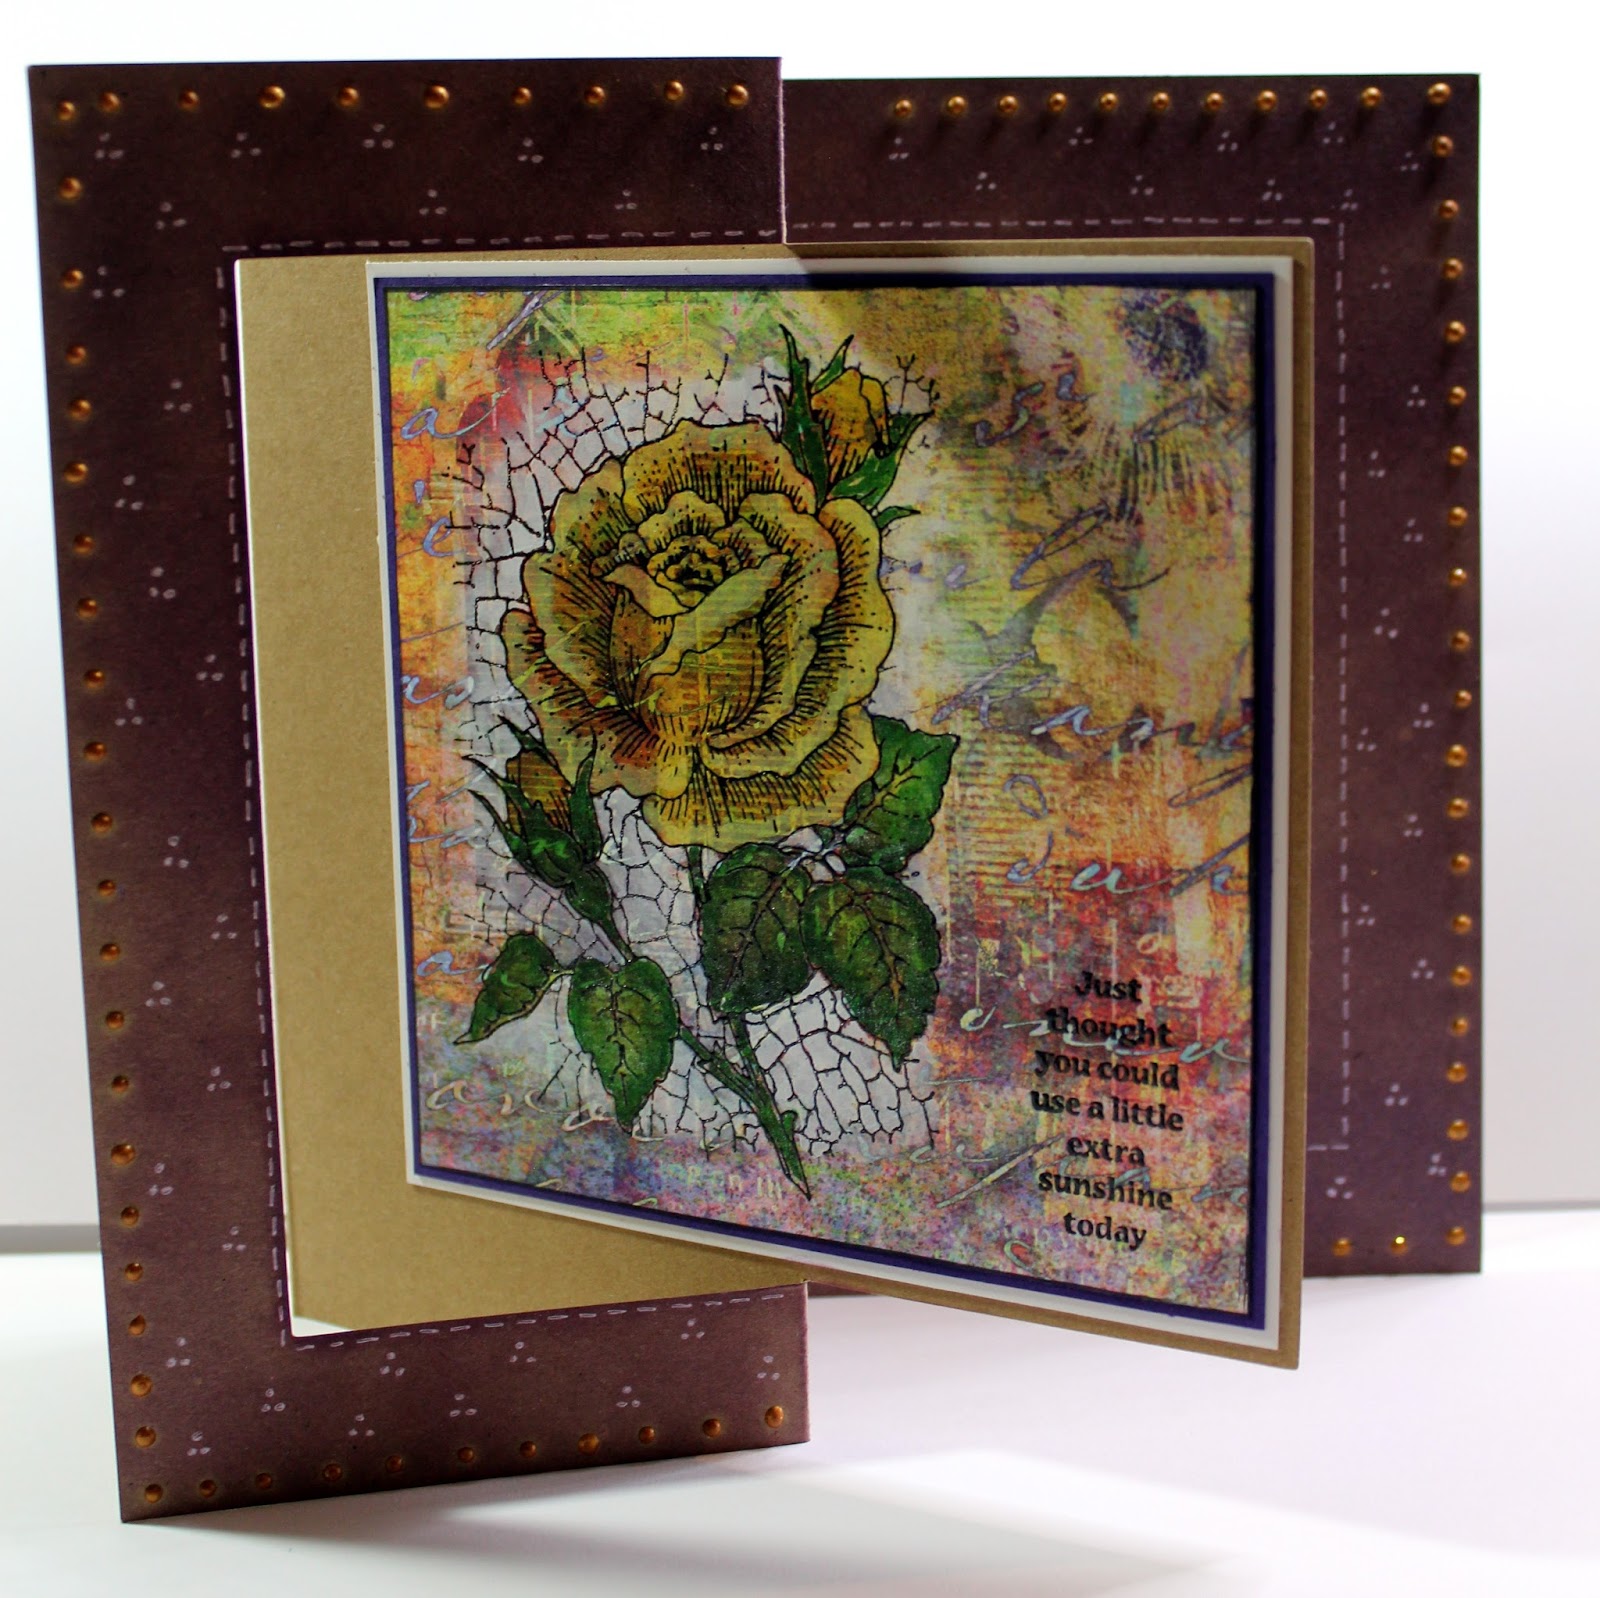
This is one of the pages that I coloured with alcohol ink pens plus a bit of sparkle pen. The paper is super smooth and a lovely quality and the images a joy to colour.

I thought that the designs would be perfect for embroidery. I first checked the copyright policy on using these designs and provided that the images are not scanned or photocopied we are permitted to physically hand trace them onto fabric. I therefore kept my second image as a template for tracing.

I found that the best method for tracing onto my fabric was using a light box and a soft pencil. I chose a small motif to try out my experiments.

I first did an experiment on a scrap piece of fabric and tried to follow the drawn outlines using free machine embroidery. This is where the sewing machine feed dogs are disengaged and the fabric is moved and guided under the needle by hand. This method also requires a special free machine embroidery or darning foot. Generally the machine is run fairly fast with this technique and the rate at which you move the fabric beneath the stitching needle determines the length of stitches achieved (i.e. slowly moving the fabric beneath the needle gives small close together stitches, fast movements provides longer stitches).


Well what a disaster! I admit that I am a little out of practice with free machining but I didn’t expect the results to be this bad – tee hee.


My darning foot has a clear acrylic end but I really could not see the outlines of the design well enough to stay on track at all while stitching. Eeek! There are other types of darning foot available, thin metal circular ends or ones where the front is open or cut away. However, for my high shank machine they are all pretty expensive at around £30 (there are more options for standard shank machines and they can be obtained fairly cheaply via China through EBay).

I really didn’t want to spend out a lot of pennies on something that I wouldn’t be sure would work for me until I actually got it home to try. My ideal would be no foot getting in the way at all so that I would have a complete clear view of the needle. I tried stitching with the foot removed (NB. Even with no actual foot in place the presser foot mechanism must be lowered in order to engage the tension discs on the needle thread). This was perfect for aligning my stitching along the design but caused bad stitch quality and skipped stitches. While operating the fabric bounced around too much (even though in an embroidery hoop) as there was no foot to hold the fabric while the needle pushed through and pulled out of the layers.


I then investigated further and found that there is such a thing as a free machine spring needle that can be used without a foot. These are not all that cheap either (£5), considering that like any needle they do wear out with use. However, it was a much cheaper option for me and gave perfect vision of my stitching outlines while working. It should last me a while too if I keep it just for projects that need detailed and accurate stitching.


I chose 2 layers of hand dyed cotton fabric with a layer of thin polyester wadding between (to give a little quilting texture). I used a small spring hoop to hold it all in place and stabilise my fabric layers. I chose a variegated embroidery thread for stitching and I was delighted with the results. Yay!


I didn’t really have a plan of what I was going to make but decided to turn it into a small padded pouch for my mobile phone.


Finally I decided to add a little colouring to the quilted design. I used Inktense pencils to add shading and then dragged out the colour using a damp brush (this makes the pigment permanent). I learned a lot making this project and I love my little phone pouch.

I have written a bit of an essay but I hope this helps anyone else trying out some free machine embroidery x.

Friday 15 September 2017

Adjustable Kanzashi Flower Ring Powertex Jewellery

Today I am sharing a pretty little adjustable Kanzashi flower ring created using fine printed cotton fabric which has been treated with Transparent Powertex to stiffen and protect it. Treating with Powertex adds strength and protects against dirt. Ideal for jewellery pieces.

There are lots of videos on YouTube showing Kanzashi flower making but most are using synthetic ribbons which are joined and sealed by melting. I used instructions from Gina-B Silkworks (this was a sample for her recent show on Create & Craft TV). Gina’s method is the traditional Japanese way using natural fabrics (silk or cotton). Being natural fibres these little flowers are simply ideal for treating with Powertex. Ready-made silk flowers could work very well too.

Really pretty and comfortable to wear (sorry that my hands are older crafters hands and not modelling quality - tee hee).


The ring is adjustable so easy fitting.

I coloured the back to match the wire colour. You can also see the adjustable ring form more easily in this pic - the backing and flower being secured to one of the flat wire coils.


Note: One thing to consider when using transparent Powertex is how it will affect the colour of the fabric. It will considerably darken many fabrics, giving them the appearance of their colour when wet. Always test out a spare scrap first so as not to be disappointed. The printed cotton that I used here changed very little in colour so I was really pleased with the result.
 
Tools and Materials:
Optional extras:
I used additional tools for making the flowers which are really helpful and make the process easier. They are not essential but you will probably want to get them if you decide that you like this craft.
  • Pack of straight and bent fine tweezers – great for manipulating fiddly items such as the small fabric squares while folding, and for placing the petals. I would say that tweezers of some sort are pretty essential unless you have really nimble fingers.
  • Kanzashi Flower Making Tool Kit – contains a mini turntable, gluing table and spreader plus a small drying table. Great to have.
  • Petal Holders & Medium Drying Table – another useful kit if wanting to make several flowers. Cotains 2 sets of petal holders (for small and larger petals) plus a bigger drying table (for more flowers).
How it was made:


My set of Kanzashi flowers made with the starter kit. I used the 7 petal rainbow one for the ring.


  1. I used the in Gina’s starter kit to make the seven petal rainbow flower. Basically little fabric squares are folded to make petals. The raw edges of the petals are then placed in thick Kanzashi starch to hold their shape while making up all the petals and building the flower. The petals are then glued to a base piece of cotton using PVA glue and left to dry overnight. Excess fabric on the base is then snipped away. I glued a small metal brad into the centre with Gemtac glue. Sorry that I am unable to give full instructions here for the flower as the specifics of this flower design belong to Gina.
  2. To make the adjustable ring I wrapped the wire around a ring mandrel and tapped the wire lightly with the hammer to work harden the ring structure. A nylon hammer helps protect against stripping off the coloured coating.
  3. I trimmed the wire and made a small curl on one side using the round nosed pliers. On the other side I made a larger curl, big enough to sit the flower onto the front and the wooden cabochon onto the back. I worked hardened and slightly flattened the wire curls using the hammer and steel block.
  4. I added a coat of clear Powertex to the back/base of the flower and wooden cabochon and left until touch dry. I then added another coat of Powertex (as a glue) and used Powertex Easy Structure to fill the voids in the wire curl, attaching the wooden cabochon to the back and flower to the front of the larger wire curl, and left it to cure overnight. The Easy Structure paste makes a nice solid bridge holding everything securely onto the back and front of the wire curl. A little Stone Art Clay would also work. Note: If you don’t have a suitable wooden cabochon a thick card/board or MDF shape could be substituted. I would advise an absorbent natural material for a strong bond with the Powertex. It also needs to be smooth so as not to scratch or irritate the skin when wearing.
  5. I then painted the cabochon and flower with Transparent Powertex, working it well into the fabric flower and crevices with a brush. Tip: If you find that you have big blobs or pools of Powertex use a piece of cotton rag to lightly dab and mop up the excess, or it can dry giving shiny blobby areas which will spoil the natural look and texture of the fabric flower. Leave to dry.
  6. Finally I painted the back of my cabochon attachment and flower base using Starlight acrylic paint. The colour match was simply perfect for the metallic pink wire that I used. If you are using copper, silver or gold plated wires you could paint with Colortricx pigment and Easy Varnish instead (to coordinate with your wire).
Powertex treatment has made this delicate fabric flower ring much more robust and protected against dirt – a more functional piece of jewellery. For further protection and full waterproofing you could add a final coat of Easy Varnish.

Quick and Easy Christmas card created for Chocolate Baroque


Good morning. This is a quick and easy Christmas card make – great when you have big batches of cards to get ready. I think that the sentiment might be better stamped directly onto the card front – quicker too.

Materials:
How to make it:
  1. Stamp the trees with Versafine and extend the base of the scene by drawing with the pen. Edge the card with black marker and a little Distress Ink. Glue to the card front.
  2. Stamp the sentiment with Versamark and emboss with the sparkly gold powder. Note: I combined 2 sentiments using the separate 'and' stamp to join them. Tip: Use a gridded acrylic block to help align the text level and straight.
  3. Trim and edge with black marker. Glue to the card front.
  4. Finish with a bow and with dots of 3D glaze pen.

Quick and easy floral cards created for Chocolate Baroque

Good morning. Here are a set of quick and easy 6 X 6 inch cards. Each can be made in under 15 minutes, so they are great for those speedy last minute makes.


I used patterned papers from Crafty Individuals (Travels in Italy or Springtime) for the background. Stamps include Harlequin Bouquet, Crackling Rose, Floribunda Net, Flora Musica and Loving Sentiments.

All were stamped with Versafine (Onyx Black) and heat embossed with WOW Embossing Powder (Clear Gloss). This makes colouring really quick and easy as the embossed lines resist the watercolour. I used watercolour pens, Distress Inks, gouache paints and sparkle pens to colour. Gouache paints are semi opaque watercolours which are great where some coverage of the underlying patterned paper is needed.

Tuesday 12 September 2017

Harlequin Bouquet card created for Chocolate Baroque


Good morning. Just catching up with blogging a few more of my recent show samples created for Chocolate Baroque on Hochanda. This one was created with the Harlequin Bouquet stamp.

Materials:
How to make it:
  1. Trim the patterned paper to make a panel approx. 5 ¾ inch X 4 ¼ wide. From the offcut cut a tag to fit the sentiment.
  2. Stamp the image and sentiment with Versafine and heat emboss with the clear powder.
  3. Colour the image with watercolour and sparkle pens. Add a little opaque gouache to give a bit more coverage over the patterned background (mix on a palette).
  4. Stamp the right hand side of the card blank with Distress Ink and heat emboss with clear powder. Edge with black pen to frame.
  5. Add faux stitching to the panel and tag using the fine tipped pen and glue to the card front.
  6. Finish with ribbon and faux gems.

Harlequin Bouquet Birthday card created for Chocolate Baroque


Good morning. Just catching up with blogging a few more of my recent show samples created for Chocolate Baroque on Hochanda. This one was created with the Harlequin Bouquet stamp.

I experimented a bit with the Soft Form Relief Paste on this one. I tried inking the stamp before coating with the paste (using Archival Ink) with the hope to transfer the ink into the paste embellishment. I wasn’t sure if the ink would just diffuse and bleed into the paste making a smudgy mess. I was really pleased with the result – the inked image stayed clean and sharp and transferred perfectly.

Materials:

How to make it:
  1. Ink the stamp with Archival Ink and spread the relief paste over the top with a palette knife. Leave to fully dry before peeling away. This will not spoil the stamp in any way and the dried paste stays flexible and is easily removed. Drying times can vary and I find that it usually takes 2 days for me (I don’t have heating). So you need to plan ahead a bit when using this but the results are worth it.
  2. Emboss the card blank with the harlequin folder and rub over with a little gilding wax.
  3. Stamp the sentiment with Versamark onto a separate piece of card and heat emboss with the gold powder. Note: I would advise dusting the card with antistatic powder before embossing. I usually do this but forgot in this case so got some stray embossing powder over the background. However, I thought it looked ok and made it a bit more vintage looking in this case.
  4. Trim the sentiment panel and glue to the card front along with the paste embellishment. Add Glossy Accents over the flowers and leaves to make them stand out.
  5. Finish with a bow and PVA pearls.

Summer Birdies card created for Chocolate Baroque


Good morning. Today I am sharing some of my samples made for the recent Christmas shows on Hochanda from Chocolate Baroque. I decided to forego Christmas with this one and make a pretty shaped summer card with the birdies.

Materials:
How to make it:
  1. Create the card blank by cutting a folded square card, through both layers, overhanging one of the die points over the card fold on the left side. Cut another whole flower from stamping card. If you don’t have a suitable die draw a flower shape onto your card blank and cut out with scissors. Consider how it will sit when standing – I arranged 2 petal points so that they sit level at the base. Use the card blank as a template to cut the stamping panel.
  2. Stamp the scene onto the front panel. No clever masking is needed, simply stamp the ‘solid silhouette’ fir tree onto the sides to partially cover and disguise the Christmas trees.
  3. Stamp the bird house onto another piece of stamping card. Extend the pole by drawing with a pen. Cut out omitting the holly leaves (just chop them off). Snip the base of the pole to fit the card front when overlaid.
  4. Colour the images with Distress Inks. Apply ink to your craft mat or a palette and pick up colour with a damp brush. Use a blending sponge for some of the larger areas (sky and trees).
  5. Attach the bird house to the card front with foam pads or 3D glue gel. Finish with a little glitter glue for added sparkle.

Monday 11 September 2017

Harlequin Bouquet With Love card created for Chocolate Baroque

Good evening. Just catching up with blogging a few more of my recent show samples created for Chocolate Baroque on Hochanda. This one was created with the Harlequin Bouquet stamp.

Materials:
How to make it:
  1. Ink up the harlequin part of the stamp with Distress Ink and stamp over the card blank to create background texture.
  2. Repeat stamp the sentiment with gold pigment ink and heat emboss with the clear powder.
  3. Stamp the image with Archival Ink and colour with watercolour and sparkle pens. Add some pencil shading for added texture.
  4. Cut the oval frame from Kraft card and rub over with a little gilding wax.
  5. Trim the topper and glue behind the frame. Attach to the card front with 3D foam for added depth.

Flora Musica Swing Back Card created for Chocolate Baroque


Good evening. Here is another of my floral makes for the recent shows on Hochanda using the Flora Musica stamp from Chocolate Baroque.

Materials:
How to make it:
  1. I used a ready made fold back card base (Crafters Companion) but it would be easy to make your own. Take an 8 X 8 inch card blank and draw a 6 X 6 panel into the centre to leave a 1 inch border all around. Cut the right hand edge of the inner panel and half way into the centre (i.e. 3 inches in). Score the outer border section only, vertically to meet the cut line from top and bottom, then fold the outer frame back to the left. Sorry it’s a bit tricky to describe but it really is easy. Try it with a piece of copy paper first.
  2. Open the card out flat and emboss each of the four outer corners with the embossing folder. Gently rub over with Distress Ink using a sponge. Add some highlights onto the roses using the clear sparkle pen.
  3. Stamp the image and sentiment onto the patterned paper using Versafine and heat emboss with the clear powder. Colour with the watercolour and sparkle pens, blending out with a damp brush. Add a little gouache to the colours if you need a little more coverage over the background pattern (gouache is more opaque). Edge with a little Distress Ink and the black marker to frame. Glue to the card front.
  4. Stamp the sentiment onto the inside of the card.

Sunday 10 September 2017

Sparkling Star card created for Chocolate Baroque


Good evening. Today I am sharing some of my Christmas makes made for the recent shows on Hochanda from Chocolate Baroque. Sorry if Christmas makes are too early for you but hopefully they will give you a bit of inspiration x.

Although I stamped the Christmas trees onto vellum and cut it out to build the star/flower petals for the embellishment, it doesn’t necessarily have to be for Christmas. White on white would make a lovely wedding card.

Materials:
How to make it:
  1. Stamp the corners onto the card blank and emboss with sparkle powder.
  2. Stamp the stripy trees 6 times onto vellum and emboss with the sparkly powder. Cut out the medium and small tree to make the petals. Glue onto the card and add the gem to the centre.
  3. Draw on the faux stitching and dot onto the background (groups of 3 dots).

Sparkling Noel card created for Chocolate Baroque


Good evening. Today I am sharing some of my Christmas makes made for the recent shows on Hochanda from Chocolate Baroque. Sorry if Christmas makes are too early for you but hopefully they will give you a bit of inspiration x.

Materials:
How to make it:
  1. Stamp the corners with multi-coloured ink onto the card blank and heat emboss with clear powder.
  2. Stamp the sentiment with pink ink and emboss with clear powder (work quickly as dye ink dries fast). Glue down the ribbon with double sided tape.
  3. Stamp the trees onto stamping card with the multi-coloured ink and emboss with clear powder. Colour with watercolour pens. When dry add some additional shading with the alcohol pen. Edge the card with dark pink alcohol marker.
  4. Apply glitter paste through the stencil with a palette knife to add some sparkly snowflakes and rain drops.
  5. Stamp the corners onto acetate and emboss with pink powder. Trim and glue behind the main panel.
  6. Fix the topper to the card with foam pads and trim the top and bottom edge of the acetate to fit the card front.
  7. Finish with PVA pearls and glitter glue plus add the bow.

Let’s Get Festive card created for Chocolate Baroque


Good evening. Today I am sharing some of my Christmas makes made for the recent shows on Hochanda from Chocolate Baroque. Sorry if Christmas makes are too early for you but hopefully they will give you a bit of inspiration x.

Materials:
How to make it:
  1. Stamp and emboss the tree scene with white powder. Trim and spritz with inks.
  2. Stamp and emboss the corner onto acetate with blue sparkle powder and trim. Stick behind top right hand edge of topper.
  3. Add some snowflakes and rain drops by applying glitter paste through the stencil with a palette knife. Add some aqua glitter glue around the border.
  4. Cut a mat for the topper from silver card and glue behind.
  5. Stamp the sentiment onto the card blank and emboss with blue sparkle powder.
  6. Stamp the snowflakes onto the background and emboss using silver sparkle powder.
  7. Add the topper to the card with foam pads for dimension.
  8. Colour the brass bells with the silver gilding wax. Add the ribbon and bells to the card.
  9. Draw on the faux stitching and finish with PVA pearls.

Christmas Blessings card created for Chocolate Baroque


Good evening. Today I am sharing some of my Christmas makes made for the recent shows on Hochanda from Chocolate Baroque. Sorry if Christmas makes are too early for you but hopefully they will give you a bit of inspiration x.

Although these decorative stamps come with a Christmas set they are not obviously Christmas and could be used with any other sentiments to create a card of any theme.

Materials:
How to make it:
  1. Stamp with Versamark Ink and heat emboss with white powder. I used a stamping platform to help me align the corners and centre. If you don’t have one of these add some pencil dots to locate the card centre and position of corners – leaving space for the sentiments. I stamped the sentiments ‘by eye’ using an acrylic block with grid markings to help me align the stamp straight, and to get the stamping lined up with the design.
  2. Add colour with the red pen and draw faux stitching around the border with a white pen.

All Hearts Home for Christmas card created for Chocolate Baroque


Good afternoon. Today I am sharing some of my Christmas makes made for the recent shows on Hochanda from Chocolate Baroque. Sorry if Christmas makes are too early for you but hopefully they will give you a bit of inspiration x.

I used the Frosty Trees and Lets Get Festive stamp sets to create this one.
 
Feeling a little reticent to share these today but running behind with some of my posts and needed to do some catch up. I am hoping that all my ‘friends’ across the water are safe and away from the dreadful storms. Feeling for all those that have lost homes, or worse, already on the nearby Islands. It looks terrifying!
 
Materials:
How to make it:
  1. Stamp and heat emboss the background with sentiment stamps and clear sparkle powder. Lay down the double sided tape sprinkle on the loose glitter and rub in well.
  2. Stamp and emboss the trees and sentiment with white powder. Cut out the panels and glue to the card front with foam pads.
  3. Add faux stitching with the white pen and finish with PVA pearls.

Friday 1 September 2017

Crackling Rose cards created for Chocolate Baroque

Good morning. Today I am sharing a couple of cards made with the gorgeous Crackling Rose and Loving Sentiments stamp set. The lovely rose collage stamp is great for quick cards, just stamp and add a little colour and you’re done. It is also brilliant for incorporating into larger projects, for something extra special, and for home décor projects too. So many ideas and never enough time to make them all – tee hee.

Do check out more posts and projects using these lovely collage stamps from my talented Teamies (Chocolate Baroque Design Team Blog).

I have used decorative papers to create quick and easy backgrounds. A great trick when in a hurry and a good way to use some of those pretty papers from your stash.


Materials for the yellow rose card:


How to make it:
  1. It is easy to make the card blank yourself by marking a 6 inch square on the card front (square 8 X 8 inch card) and cutting it only half way around on the right hand side. Score the top and bottom sections vertically in the centre of the card and fold back the cut half frame section.
  2. Colour the frame on the card front and the inside panel with Distress inks. Draw on the faux stitching and dot details, matching up the design when the card closes.
  3. Stamp the Rose and sentiment onto the decorative paper with Versafine ink and heat emboss with the clear powder. Colour with sparkle pens and a damp brush, adding a little white gouache to the rose for highlights. Colour around the rose background with a little dilute gouache to help the rose stand out more. Mat and layer onto the card front with purple and white card.
  4. Stamp the rose and sentiment onto the inside of the card with Versamark and emboss with gold powder. Colour with Distress Inks and a damp brush. Add some clear sparkle overlay pen for highlights. Draw some rain drops with the fine tipped pens.
  5. Finish with PVA pearls and Glossy Accents to make highlight rain drops on the inner panel.

Materials for the blue rose card:


How to make it:
  1. Randomly stamp the card front with the pearlescent ink and the rose stamp.
  2. Stamp the rose and sentiment onto the decorative paper with Versafine and heat emboss with clear powder.
  3. Colour with Distress Ink and sparkle pens, dragging out and blending colour with a damp brush. Add a little opaque white paint for highlights. Add a wash of Distress Ink around the rose to make it stand out more from the background. Glue to the card front.
  4. Add faux stitching with the white pen.
  5. Finish with PVA pearls and a little glitter glue for sparkle.